I have made several different types of breads over the years and have found this Artisan Bread to be the easiest yet. I first started making bread when I was about 14 and away at a youth camp. We used to rise up at 2 am and start making different kinds of breads every Saturday. There was a bunch of us that made the bread, measuring the ingredients, setting it to rise, and then putting it into the enormous commercial oven. Oh the smells of fresh bread baking in the oven was a thing that was not easy to forget.
We made white and brown bread, braided bread, yeast and no yeast bread. Once they were all baked and cooled we would place them in special paper bags and load them into a bread tray and take them to the huge farmers market to sell to the public. If my memories serve me right, we made between 40-60 loaves every Saturday. The money that was raised went towards the restocking the needed supplies for making more bread or something or other towards some sort of program at the farm.
I have in one way or other been involved with food for many years throughout my lifetime. Each experience that I had was different and a learning experience. Sitting back and reflecting on my summers at the farm, the work that we did, from baking bread, feeding slop to the pigs, tending the garden, milking the cows, helping prepare food in the massive kitchen, or the gathering around the campfire for sing-a-long, it was an adventure that was rewarding and memorable. I still can recall the moments, and the smell of bread baking, even though many years have passed since then.
I have always had a weakness for bread, the texture, the smell, and the taste. I am sharing this Artisan Bread recipe for you to make for yourself, your family, or even your friends. It is the easiest yeast bread to make, I promise you! My kids love it!
Eat it a la carte, topped with butter, with soup, stew, spaghetti, chili, or whatever other dish that pleases you. I can guarantee that once you make it once, you will definitely be making it again.
Artisan Bread-No Knead
*1 Lodge Cast Iron 5 Qt. Dutch Oven
3 cups all purpose flour
1 1/2 cups warm water
1-2 tsp salt (I used 1 tsp in mine and it tasted great)
1 tsp yeast
Feel free to Pin This!
Follow me on Pinterest. Follow me onTwitter
*For baking this bread, I used a Cast Iron 5 Qt. Dutch Oven by Lodge* Although it is not a requirement for baking this bread, the end result is fantastic. If you want to find a great cooking accessory then this Dutch Oven it. It can be used in the oven to bake bread, make soups, stews, whole oven roasted chicken, and much more. Simply add your ingredients, cover and place in preheated oven as per your recipe instructions. It is very convenient. The lid also works as a cast iron skillet, so you actually get two kitchenware pieces in one. I have highlighted the Lodge Cast Iron 5 Qt Dutch Oven with a direct link to where you can purchase one, if you wish to do so. It is my affiliate link, meaning if you make a purchase by using the link, I will earn a small commission. Thank you for doing so, I appreciate it.
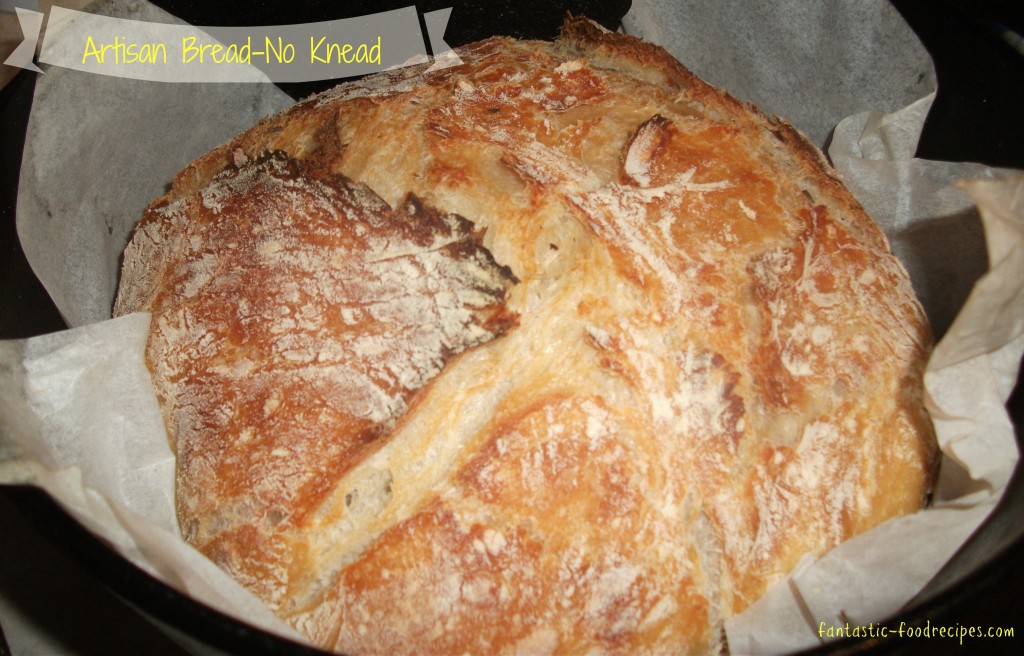
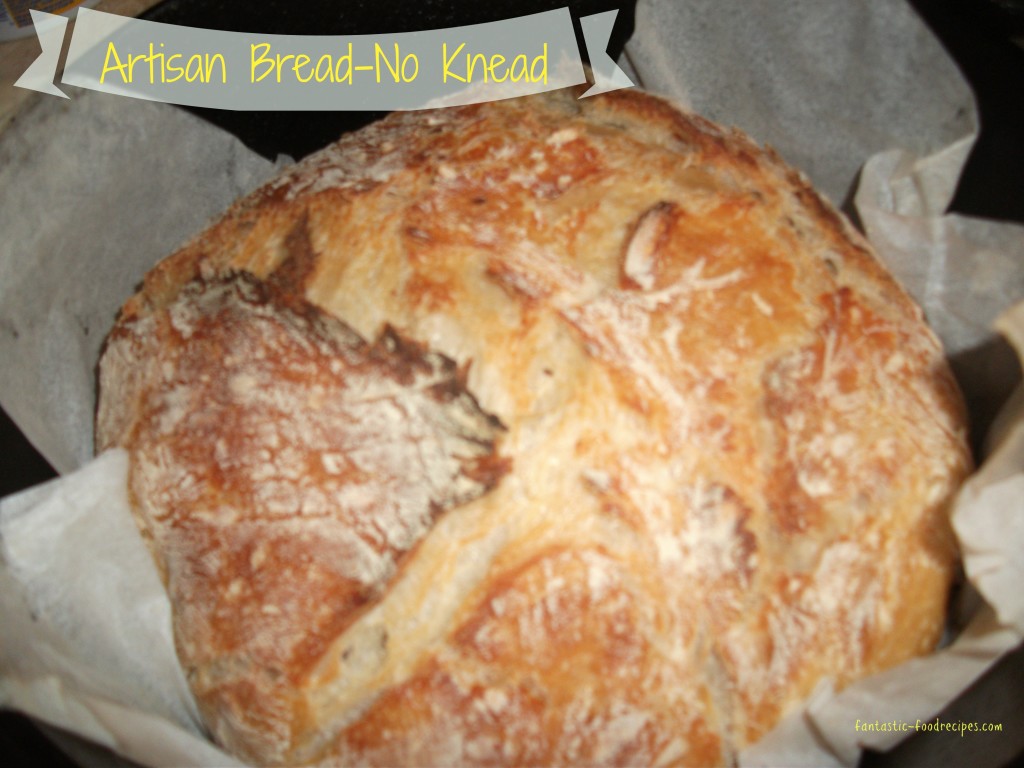
I have heard that you can also use other ovenproof pots with lids. However, you must cover the lid knob and handles so they will not burn. I have not used any other cookware besides the Dutch Oven so I am not sure what type of texture or results that you would get. When I make this bread with the Lodge Dutch Oven, the outside texture is crispy, crunchy, not hard, not soft, just perfect!
Now enough of my yabbering, on to the directions for making the bread!!!
Artisan Bread- No Knead Directions
1. Add the flour, yeast and salt to a large mixing bowl.
2. Stir to mix ingredients together.
3. Make a hole in the middle of your mixing bowl by moving the flour mixture to the sides of the bowl.
4. Turn on your hot water tap and let the water run until it is lukewarm.
5. Take the measuring cups and get 1 1/2 cups of warm water from the tap.
6. Pour in 1 cup warm water into the well (hole section) of the bowl.
7. Use a wooden spoon to mix the flour and water together. Make sure to scrape flour from the side of the bowl.
8. Add the additional 1/2 cup warm water to the flour and continue mixing until well combined.
9. The dough will be wet and sticky. That is perfect!!!
10. Cover the bowl with plastic wrap and let rise on the counter top for 8-18 hours. (I added some time to the rising of my dough. I think it was approximately 30 hours.
11. Once the dough is ready and has risen to almost double or triple its starting size. It is time to turn on the oven.
12. Turn the oven on to 450 degrees Farhenheit.
13. Sprinkle some flour onto the counter top or cutting board.
14. Put some flour onto your hands and roll the dough into a ball.
15. Cover the ball shaped dough with plastic wrap and set it aside to rest.
16. Now, while the dough is resting, you are going to preheat your Lodge Cast Iron 5 Qt. Dutch Oven or whichever pot/pan you choose to use. Make sure the knob and handles are covered with foil.
17. Place the empty baking pot/pan or dutch oven into the 450 degree Farhenheit oven onto the center rack.
18. Allow the baking dish to preheat for 30 minutes.
19. Put on a pair of oven gloves and remove the baking dish from the oven. Set aside on stove top. *It will be very hot, so be careful.
20. Take a sheet of parchment paper and dust lightly with flour.
21. Dust your hands with flour and then unwrap the ball of dough.
22. Place it onto the floured parchment paper.
23. Take the lid off of your preheated dutch oven and place aside.
24. Carefully take two or four corners of the parchment paper and lift the paper up with
the dough ball on it and place it inside the dutch oven.
25. Put the lid of the dutch oven or pot lid back on.
26. Place in oven on center rack and bake covered for 30 minutes.
27. Remove lid and continue baking for another 15 minutes.
28. Remove from oven and set the baking dish onto the top of the stove to cool.
29. Take out a wire rack, then place the Artisan Bread-No Knead onto the wire rack to cool
completely.
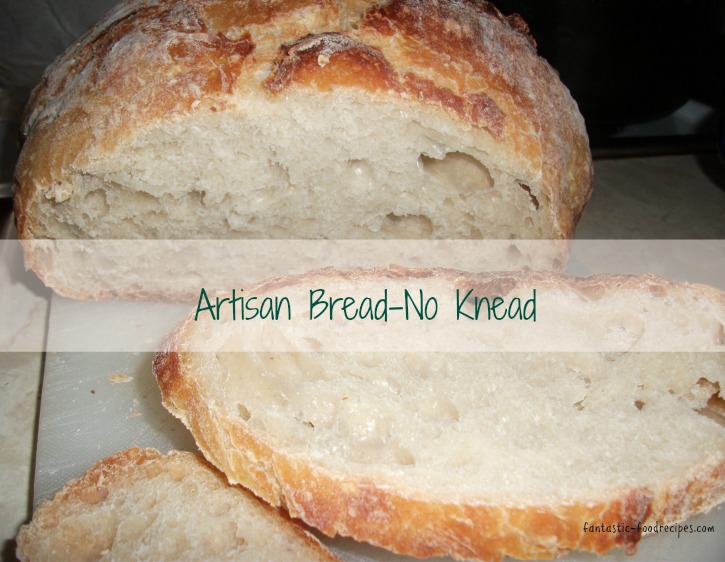
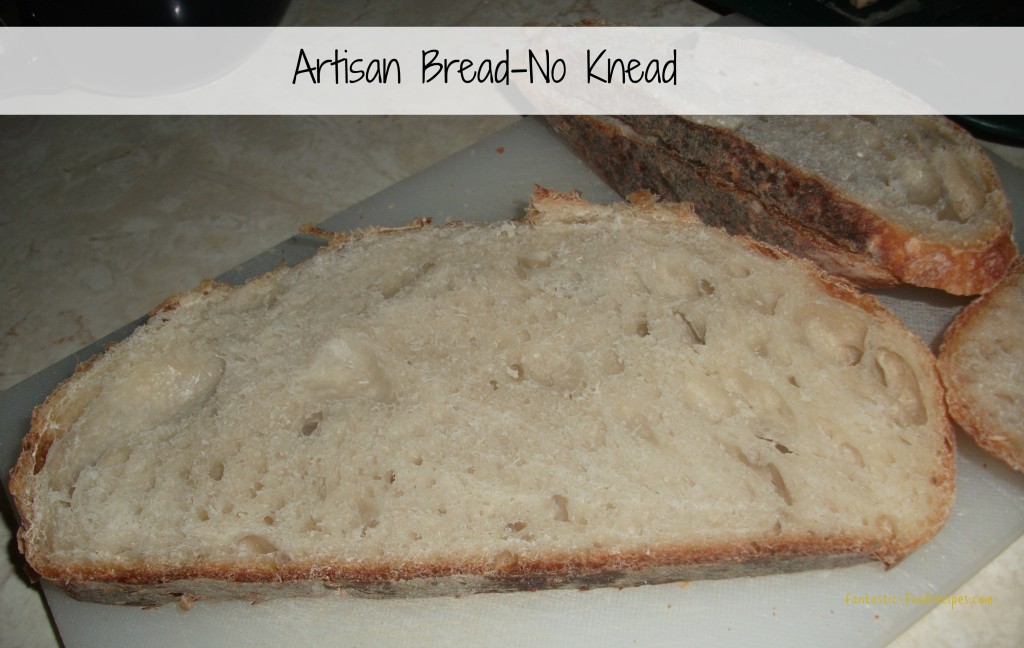
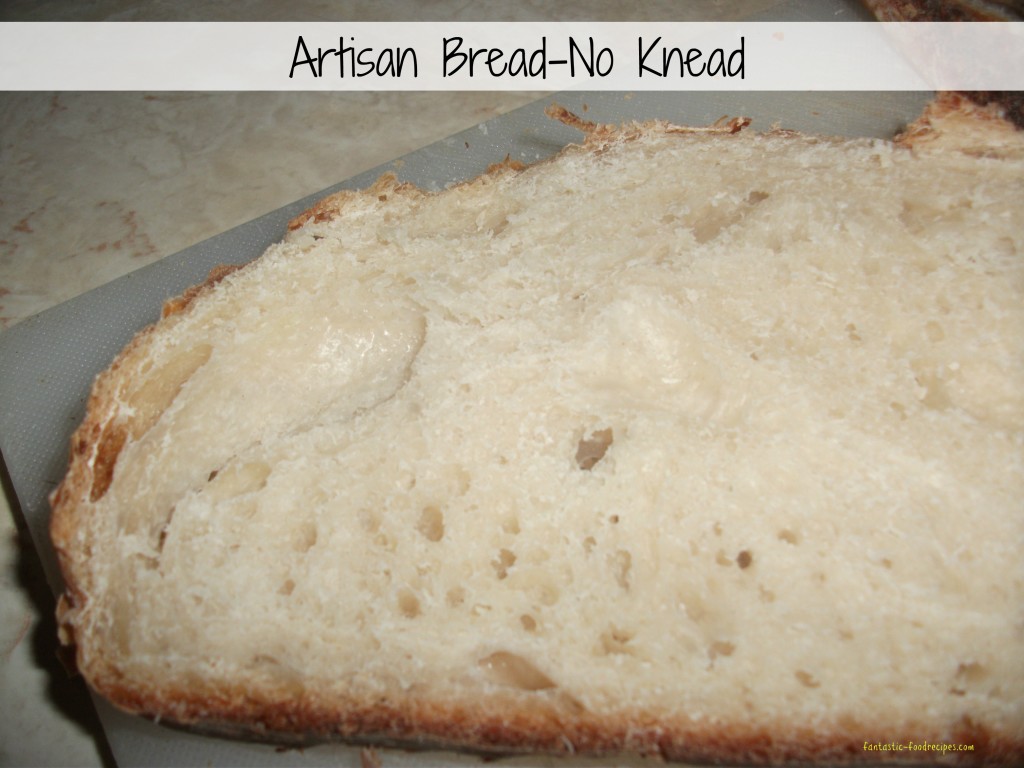
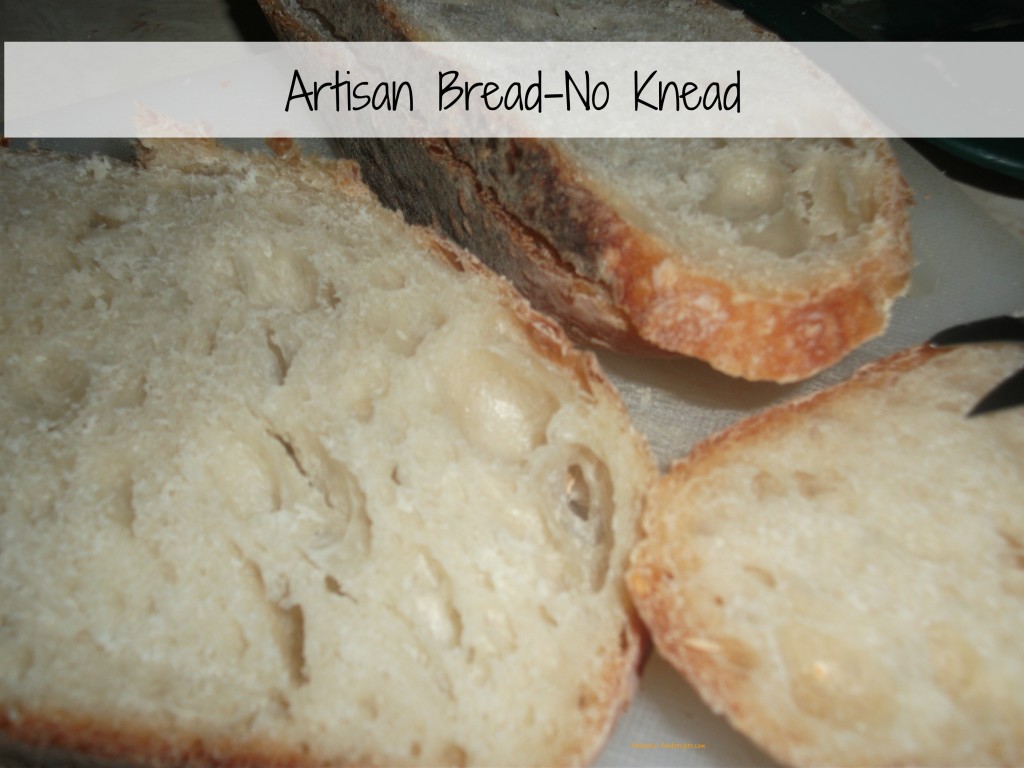
30. The end result will be a bread that is crispy on the outside, and perfect on the inside!
31. Once the bread has cooled completely, place and cutting board and cut it to the thickness
that you desire.
32. Serve plain, topped with butter or margarine or the topping of your choice.
33. Enjoy!!!
The next time I make this bread I will update this post with process shots…I promise.
Feel free to Pin This!
Follow me on Pinterest.Follow me onTwitter
| Servings | Prep Time |
| 1 loaf | 20 minutes |
| Cook Time | Passive Time |
| 45 minutes | 8-24 hours |
|
|

|
I have always had a weakness for bread, the texture, the smell, and the taste. I am sharing this Artisan Bread recipe for you to make for yourself, your family, or even your friends. It is the easiest yeast bread to make, I promise you! My kids love it!
|
- 3 cups all purpose flour
- 1 1/2 cups warm water
- 1-2 tsp salt I used 1 tsp in my bread
- 1 tsp yeast
- 1. Add the flour, yeast and salt to a large mixing bowl. 2. Stir to mix ingredients together. 3. Make a hole in the middle of your mixing bowl by moving the flour mixture to the sides of the bowl. 4. Turn on your hot water tap and let the water run until it is lukewarm. 5. Take the measuring cups and get 1 1/2 cups of warm water from the tap. 6. Pour in 1 cup warm water into the well (hole section) of the bowl. 7. Use a wooden spoon to mix the flour and water together. Make sure to scrape flour from the side of the bowl. 8. Add the additional 1/2 cup warm water to the flour and continue mixing until well combined. 9. The dough will be wet and sticky. That is perfect!!! 10. Cover the bowl with plastic wrap and let rise on the counter top for 8-18 hours. (I added some time to the rising of my dough. I think it was approximately 30 hours. 11. Once the dough is ready and has risen to almost double or triple its starting size. It is time to turn on the oven. 12. Turn the oven on to 450 degrees Farhenheit. 13. Sprinkle some flour onto the counter top or cutting board. 14. Put some flour onto your hands and roll the dough into a ball. 15. Cover the ball shaped dough with plastic wrap and set it aside to rest. 16. Now, while the dough is resting, you are going to preheat your Lodge Cast Iron 5 Qt. Dutch Oven or whichever pot/pan you choose to use. Make sure the knob and handles are covered with foil. 17. Place the empty baking pot/pan or dutch oven into the 450 degree Farhenheit oven onto the center rack. 18. Allow the baking dish to preheat for 30 minutes. 19. Put on a pair of oven gloves and remove the baking dish from the oven. Set aside on stove top. *It will be very hot, so be careful. 20. Take a sheet of parchment paper and dust lightly with flour. 21. Dust your hands with flour and then unwrap the ball of dough. 22. Place it onto the floured parchment paper. 23. Take the lid off of your preheated dutch oven and place aside. 24. Carefully take two or four corners of the parchment paper and lift the paper up with the dough ball on it and place it inside the dutch oven. 25. Put the lid of the dutch oven or pot lid back on. 26. Place in oven on center rack and bake covered for 30 minutes. 27. Remove lid and continue baking for another 15 minutes. 28. Remove from oven and set the baking dish onto the top of the stove to cool. 29. Take out a wire rack, then place the Artisan Bread-No Knead onto the wire rack to cool completely. 30. The end result will be a bread that is crispy on the outside, and perfect on the inside! 31. Once the bread has cooled completely, place and cutting board and cut it to the thickness that you desire. 32. Serve plain, topped with butter or margarine or the topping of your choice. 33. Enjoy!!!
Although it is not a requirement to use a Lodge 5 Qt Dutch Oven with Skillet Cover, it is what I used to make the Artisan Bread-No Knead. The cast iron cookware creates a crust that is crispy, crunchy and semi-soft. The inside of the bread is fabulous. It is easy to make and delicious to eat. I can bet you will be making it more than once!




This bread looks beautiful.
Looks so good – I’ll have to break out my dutch oven and give this a try!
Pinterest link not working:( Try using the share button at the bottom of the post. I clicked it and it worked fine for me.